After seeing a few photobooth projects on BYOAC, I decided to build one for my Daughter's upcoming wedding. I searched the 'net for some ideas and some where so so and others were, well lets say just down right dumb! I wont say I have the best design, but it is portable and sets up in less than 7 minutes.
Here is where it started:


I let Lowes do all the cutting. Its 5/8" (8' length x 4' wide) thick single sided plywood (x3). I was going to use 3/4" plywood but the weight of it was prohibitive. I had 2 pieces of the plywood cut as in the pictures above. I had 12" hacked off the short side and the long pieces are 7' in length and 1 at 30" wide, the 2 smaller pieces are 7' in length and 9" wide (x2 sheets of plywood).

As for the top, I had then hack 12" off the short side and cut the top at 7' in length and 30" wide.
I assembled to 2 uprights with old door hinges I had. You can see them in the pic. The 2 uprights fold right up!
The top was fitted with 1"x2" furing strips for 2 reasons. 1) so the 9" sides dont just fold in. 2) so I get a top that fits right everytime.


I attach the top with 4 - 3" wood screws in each corner of the top. Nice & sturdy!
I made a touchscreen monitor stand out of the scraps from the 3 sheets of plywood that were 4' in length and 12" wide.
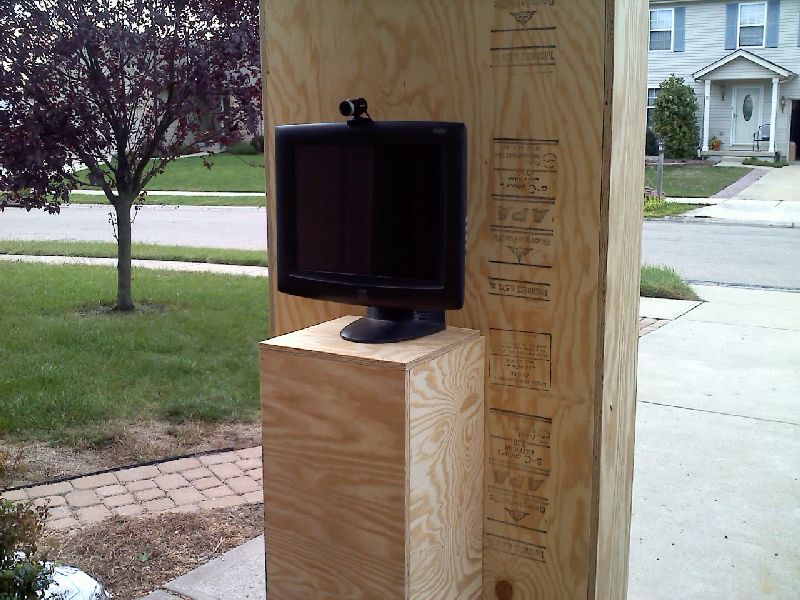


Here it is unpainted and without the curtain


I racked my brain with how I was going to put curtains on it. While at work, we have machines made by a German company called Reishour (they stone cut gears) and in one of the machines, it has a curtain that automatically closes to prevent chip from flying out of the cutting area. The curtain follows a bowed rod when closing and it hit me! Just do it like the machine does! Simple!
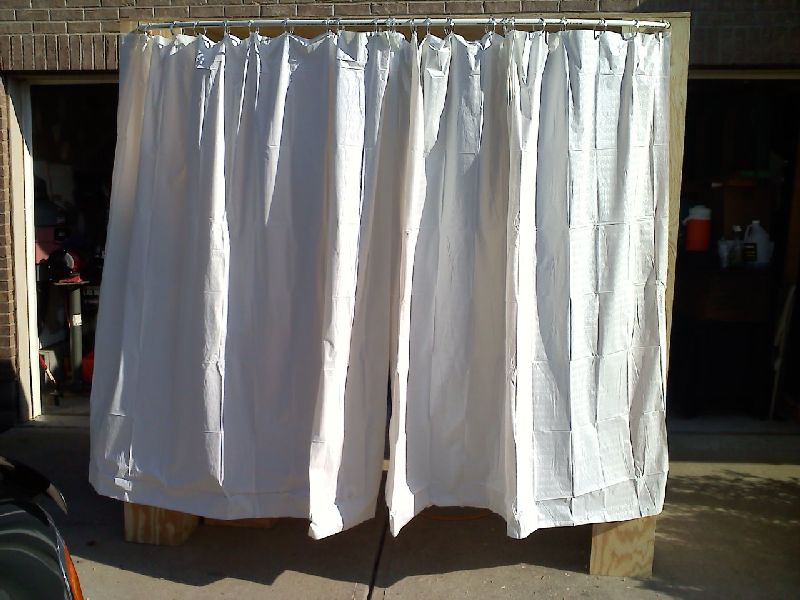


I cut a couple holes in the uprights 3" from the side and 1 1/2" from the top. I had some 1/2" PVC pipe in 10' sections in the garage, I cut them down to 84", bowed them and set them into the holes. When I placed the rods in the holes, I got a bonus from doing that, it made an already strudy project into one that had no movement to it at all!

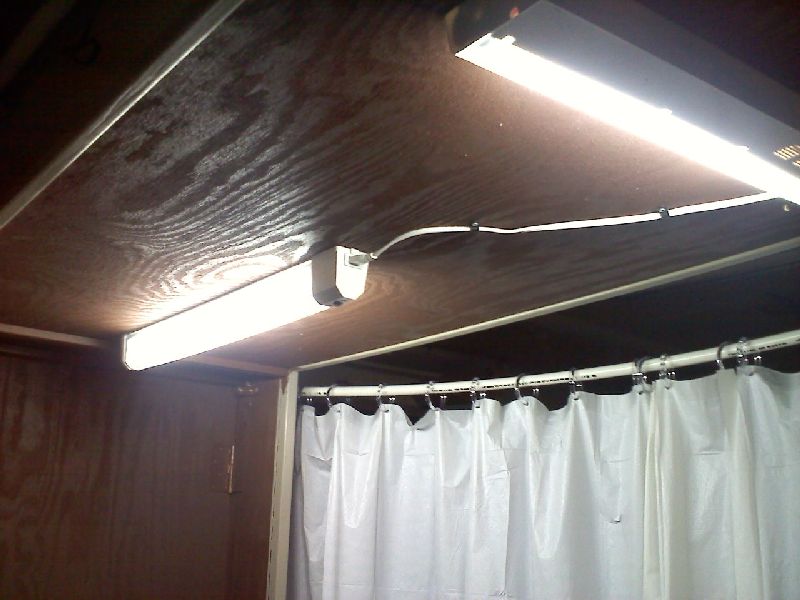
I added 2 flouresent lights onto the top for lighting. Works GREAT!

Next: Paint
My Daughter's wedding colors are brown, cranberry red and burnt orange (autumn colors).
I painted the 2 uprights brown. The monitor stand is painted cranberry red. I was going to make the curtains burnt orange but finding some within my budget has been a difficult task (cant find them at goodwill either).

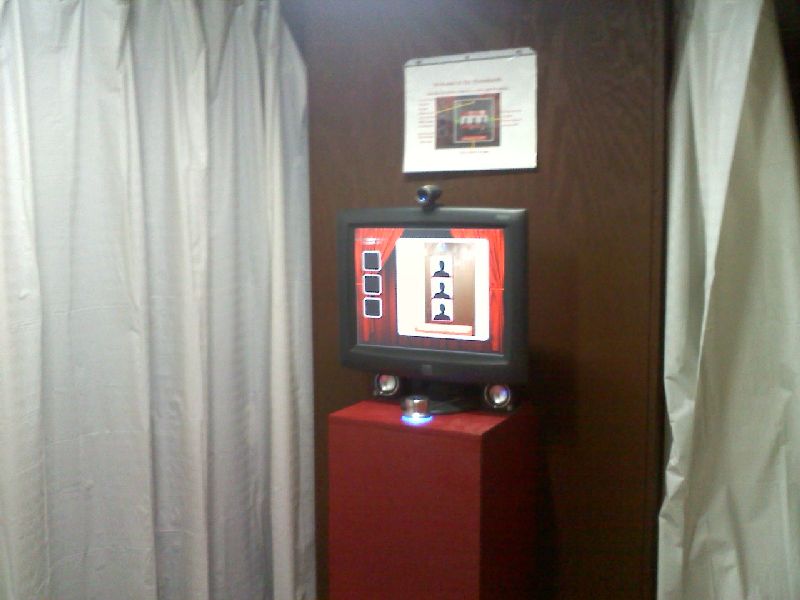


I decided to attach the monitor stand to the upright (were going to have a lot of little kids at the wedding) and I had to feed the wires from the touch screen to the computer. In the pic below, you can see the 2 screws attaching the monitor stand through the upright as well as the wire feed hole.

The computer and printer are sitting on a table just outside of the booth.

I added and instruction sheet inside the booth. Easy to use and no need for mouse/keyboard.

After getting a splinter from the back upright when walking into the booth, I was going to just sand the rough edges down and repaint. I found that vinyl siding J-channel pieces have a 5/8" opening for siding, so I bought 6 pieces (12' lengths) to cover any rough edges on the uprights and top that people may place there hand.

Im going to pray paint the J-channels burnt orange (waiting on my Amazon order
 to get here) to go with the wedding color scheme.
As for construction, thats about it.
Software: I tried about 8 different pieces and 2 stuck out. Sparkbooth and Webcam Photobooth from Breeze Systems. I like Breeze Systems a little better than Sparkbooth, but for the price ($99 a 1 year, 1 machine license and $99 each year after). Sparkbooth was a one time $59 fee with lifetime upgrades (I guess lifetime depends on how long the programmer wants to work on it). I went with price! It is easy to use and setup as well. I did have to add a Griffin Powermate for a cancel process button (Ive been begging the software developer to add a touch button to the screen for cancel, but so far he hasnt). It will post to Facebook or twitter (input your setting ahead of time) and or email. You can have custom backgrounds or overlays. www.sparkbooth.com
Computer: You need a decent dual-core computer to run just about any of the photobooth software choices there were. Mine is a 2.8ghz Intel dual-core, 2gb ram, W-Vista (
 ) machine. I had taken it down to XP-SP3 but Sparkbooth was created with a Mac and actually made for Win7, so it ran on XP, but not that well. Back to Vista we go (I have a Dell OEM Vista DVD).
Printer: HP-F300 Series. Its a decent printer and will work well for what it is being used for.
Parts List:
4'x8' sheet of 5/8" think single sided sanded plywood (x3) @ $21.00ea
door hinges (x12) @ $1.85ea
undercounter lights (x2) @ $6.00
1/2" PVC 84" lengths (x2) @ $1.95ea
72" white shower curtains w/hooks (x4) @ $3.00 includes price of hooks
brown paint (1 gallon) @ $18.00
cranberry paint (1 quart) @ $9.00
burnt orange spray paint (1 can) @ $10.00
Vinyl J-channel (x6) @ $2.25ea (on clearance at Lowes)
2.8 ghz Dual Core computer w/Vista @ $85.00
Elo 15" Touchscreen @ $60.00
Microsoft LifeCam Cinema @ $70.00 (overkill for webcam needed)
HP F300 Printer @ $15.00
Griffin Powermate (for cancel process button) @ $20.00
Cheap-o set of speaker @ $5.00
My time for this project (about 14 hours build and computer/software configuation) @ $PRICELESS$
Here are some of the results after adding custom backgrounds and a few hours tweaking:
Here I am making faces and some are with my boy!




I'll get some pics folded up for storage in the next day or so!
Fordman

